LE NET: Download and Install ClashXPro for macOS – Step-by-Step Configuration Guide

Download and Installation
- Download ClashXPro for macOS
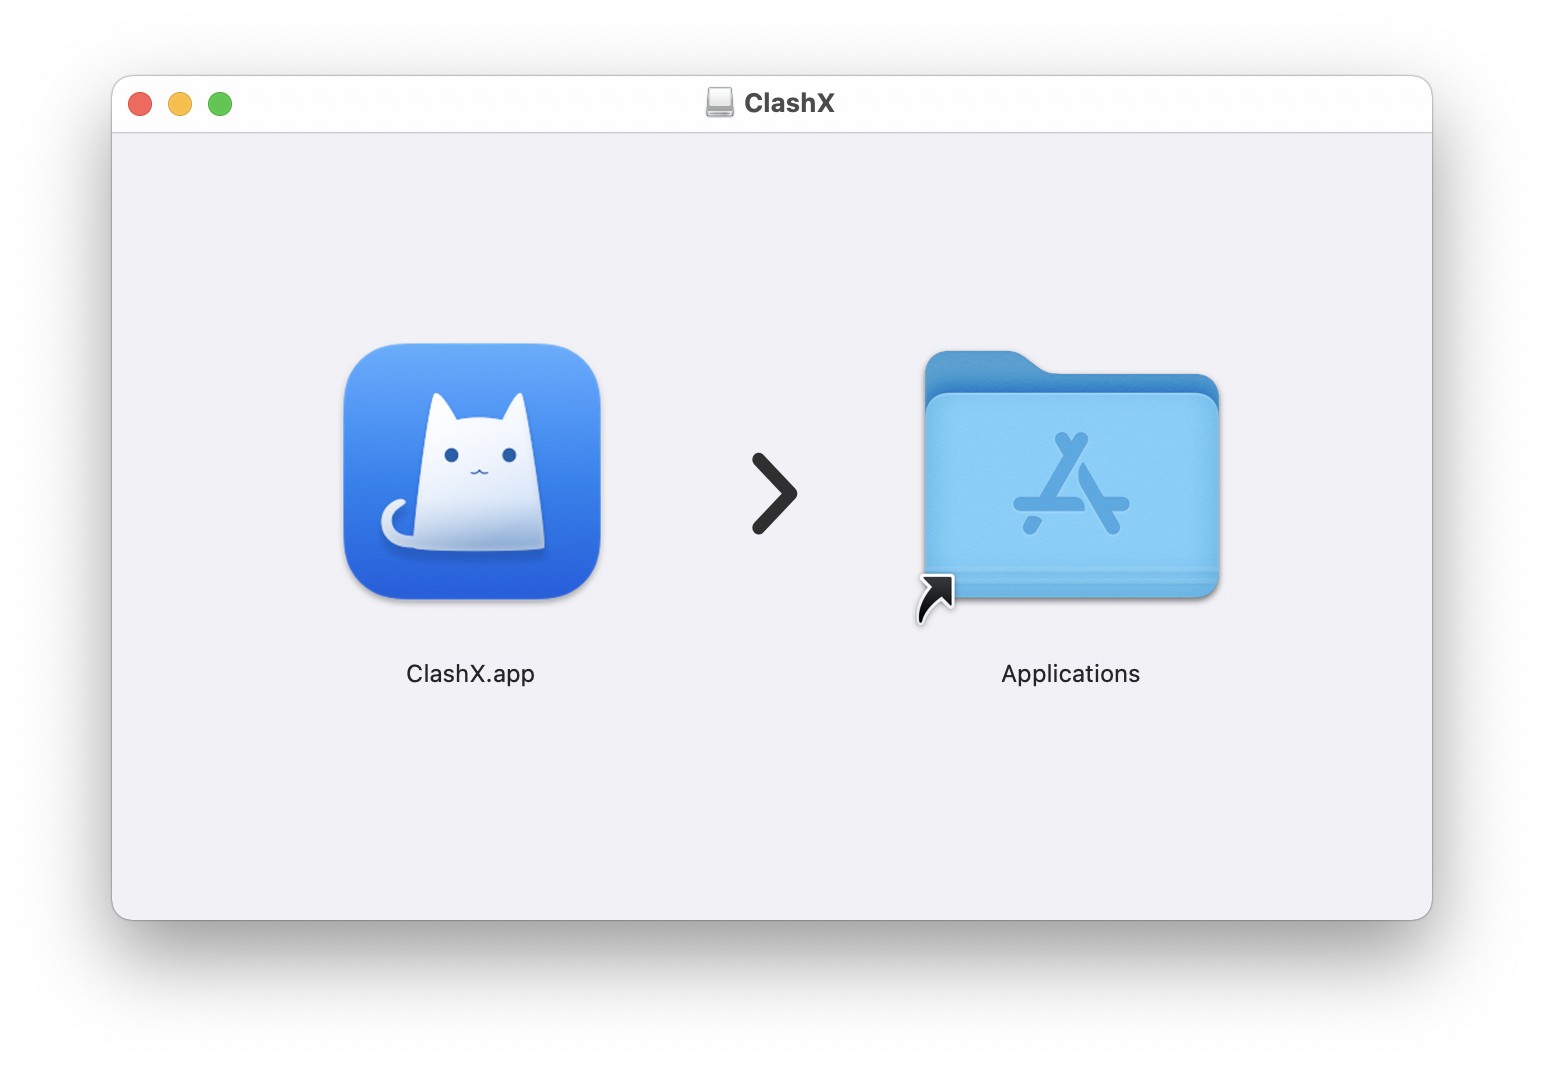
After downloading the dmg disk image file, open it and drag ClashXPro into the Applications folder.
Note: If a firewall prompt appears, click “Allow” to grant access.
Subscription Import
Note: If you have not purchased a subscription plan yet, please do so first.
- Log in to the official website with your account credentials.
- Navigate to 【Dashboard】→【Quick Subscription】to bring up subscription options.
- In the pop-up window, select 【Import ClashX Meta】. Ensure you have downloaded and installed the client before importing.
Configuration of ClashXPro
- If not using One-Click Subscription, you can still click “Copy Subscription” to copy the subscription link to your computer.
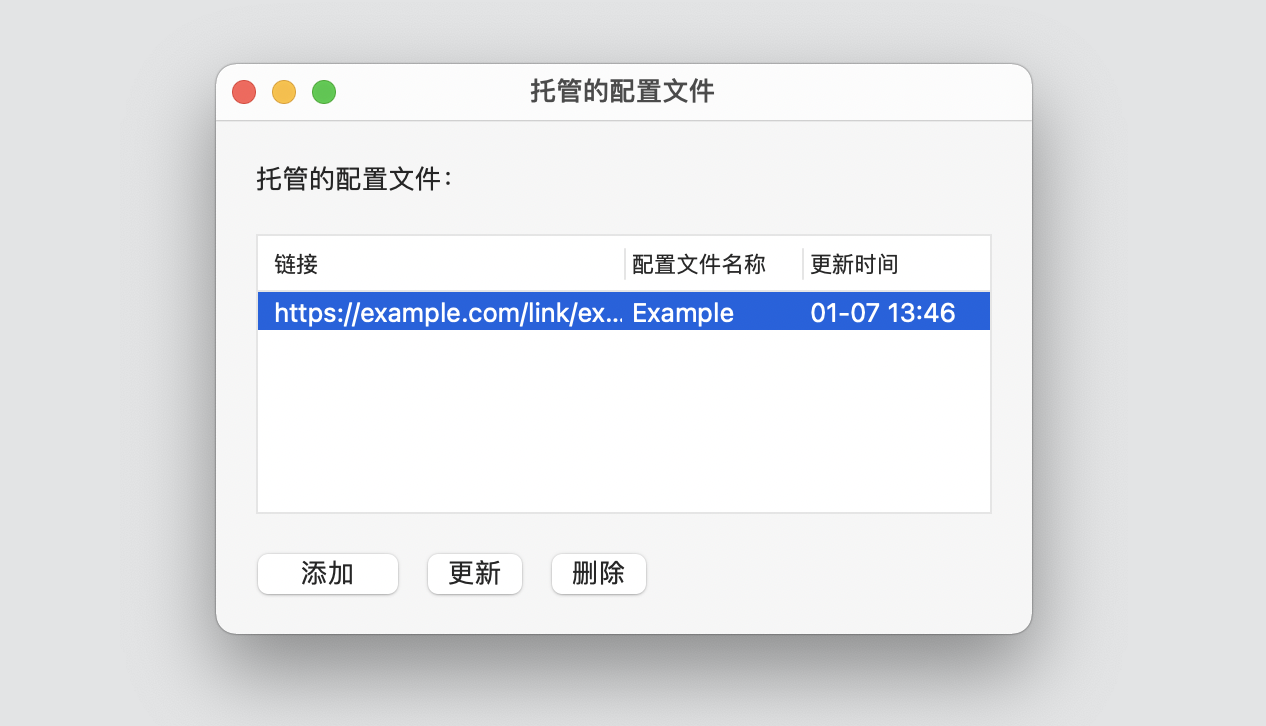
- Open ClashXPro, click on the ClashXPro icon in the menu bar, and navigate to 【Config】→【Managed Configurations】→【Management】.
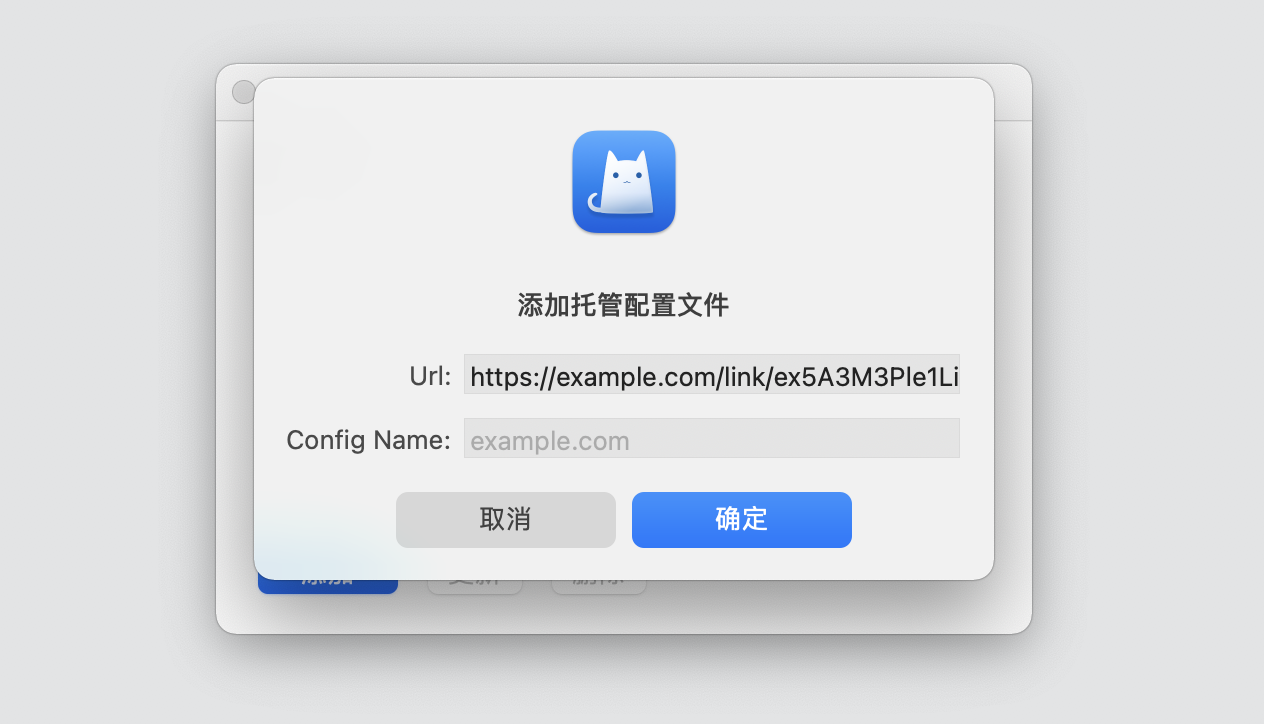
- In the Managed Configurations window, click “Add”.
- Paste the subscription URL into the URL field, and optionally fill in the Config Name.
- After successfully adding, ClashXPro will automatically download the configuration file from the link. Close the window after the “Update Time” refreshes.
Enabling ClashXPro
Select “Set as System Proxy” from the ClashXPro menu to start routing system traffic through ClashXPro.
Note: ClashXPro defaults to “Rule” for outbound mode; it is not recommended to select “Global” or “Direct” modes.


